For optimal effect with Fake Dome Bullet Cameras in mock surveillance systems, strategically place them at entry points, windows, and common areas for clear line-of-sight coverage. Utilize vertical mounting and avoid blind spots. Adhere to privacy regulations while maximizing visibility. Mount cameras at eye level or slightly elevated and run secure wiring to a central control panel. Regularly test and calibrate cameras using provided software to ensure accurate footage capture and transmission, enhancing the system's authenticity and effectiveness.
“Uncover the secrets of creating an effective mock surveillance system with our comprehensive installation guide. This step-by-step process focuses on the crucial element: Fake Dome Bullet Camera Placement. From understanding these specialized cameras’ capabilities to strategically planning your layout, you’ll learn how to cover all essential areas. We’ll guide you through the installation process, from selecting mounting hardware to meticulous wiring, ensuring optimal performance. Discover how proper testing and calibration can enhance your mock surveillance system’s reliability.”
- Understanding Fake Dome Bullet Cameras and Their Placement
- Planning the Layout: Areas to Monitor and Coverage Requirements
- Installation Steps: From Mounting Hardware to Wiring
- Testing and Calibration: Ensuring Optimal Performance of Your Mock Surveillance System
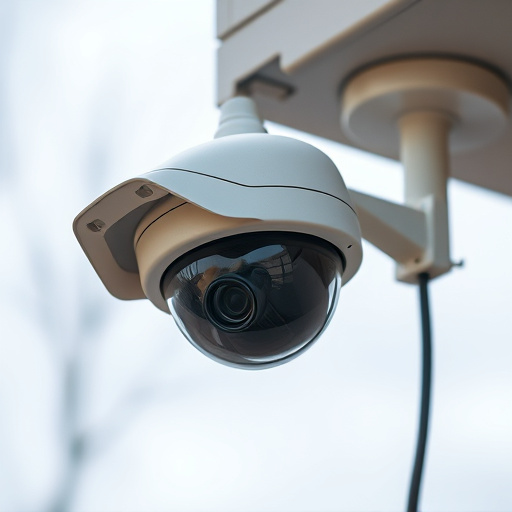
Understanding Fake Dome Bullet Cameras and Their Placement
Fake Dome Bullet Cameras are a popular choice for mock surveillance systems due to their design and functionality. These cameras mimic the look of traditional security cameras with a dome-shaped housing, but they don’t capture real footage; instead, they serve as visual deterrents. When installing these cameras, strategic placement is key. Typically, they should be mounted in areas that offer a clear line of sight, such as entry points, windows, and common areas.
The placement should also consider the camera’s field of view. Aim to cover key zones without duplicating coverage. For example, position one camera near the front door to monitor arrivals, another by the back door for departures, and additional cameras at strategic points along exterior walls or in parking lots. This approach ensures a comprehensive simulation of a real security setup while maintaining the illusion of constant surveillance.
Planning the Layout: Areas to Monitor and Coverage Requirements
When planning the layout for a mock surveillance system, it’s crucial to identify areas that require monitoring and determine the coverage requirements. Start by assessing the physical space, such as offices, hallways, or outdoor areas, where potential security risks might occur. Consider high-traffic zones, sensitive equipment, valuable assets, and entry points. This step involves strategic thinking about the camera placement to ensure comprehensive coverage without any blind spots.
The Fake Dome Bullet Camera is a versatile tool for surveillance. Place these cameras at strategic locations, aiming to capture clear visuals of all areas in need of monitoring. Think vertically as well; mounting them on ceilings or walls can provide a broader field of view and better angles for detailed footage. Ensure each camera’s placement adheres to privacy regulations while maximizing its visibility and effective coverage.
Installation Steps: From Mounting Hardware to Wiring
When installing a mock surveillance system, one of the crucial steps is determining the optimal placement for your Fake Dome Bullet Cameras. Strategically positioning these cameras resembles real surveillance equipment, enhancing the system’s authenticity. Consider areas with high visibility, such as entry points or common gathering spaces, to maximize their deterrence effect. Ensure the cameras have a clear view and are mounted at eye level or slightly elevated to capture detailed footage.
The wiring process is another vital aspect of installation. Run high-quality cables from each camera to a central control panel or DVR (Digital Video Recorder). Follow a logical and organized route, ensuring wires are secured and out of sight for a clean and professional appearance. Properly label connections at both ends of the cable run to simplify future troubleshooting and maintenance.
Testing and Calibration: Ensuring Optimal Performance of Your Mock Surveillance System
Testing and Calibration are crucial steps in ensuring your mock surveillance system operates at peak performance. After installing your Fake Dome Bullet Cameras, it’s essential to calibrate their focus, zoom, and field of view to match real-world conditions. Start by adjusting each camera’s settings using the provided software to optimize its view of the target area.
Next, simulate various scenarios, like moving objects or changing lighting conditions, to test the system’s responsiveness. Verify that the cameras accurately capture and transmit footage without delay or distortion. Regular calibration ensures your system remains effective in simulating surveillance, allowing you to identify and address any performance issues promptly.
Installing a mock surveillance system, with its sophisticated Fake Dome Bullet Cameras, is a detailed process that requires careful planning and execution. By understanding camera placement principles, mapping out monitoring areas, and meticulously following installation steps, you can create an effective security solution without breaking the bank. Remember, proper testing and calibration are key to ensuring optimal performance, giving you peace of mind and enhanced security for your property.